> For the complete documentation index, see [llms.txt](https://docs.patchmypc.com/llms.txt). Markdown versions of documentation pages are available by appending `.md` to page URLs; this page is available as [Markdown](https://docs.patchmypc.com/patch-my-pc-client/manage/deploy.md).
# Deploy the Patch My PC Client
*Applies to: Patch My PC Client*
To deploy the Patch my PC (PMPC) Client:
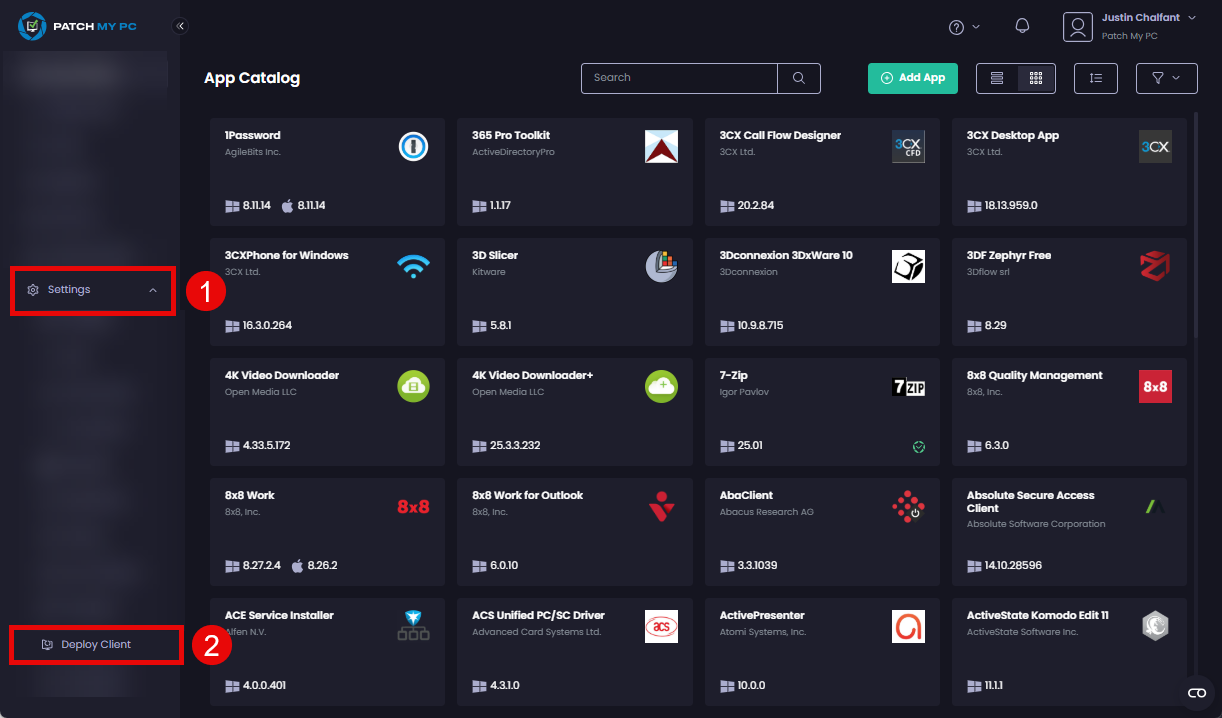
1. Navigate to **Settings | Deploy Client**
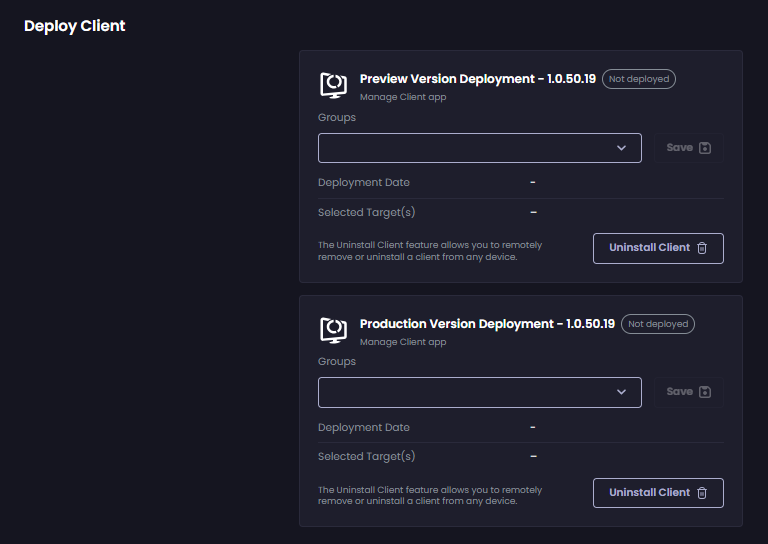
The **Deploy Client** screen is shown, which is split into two sections:
* **Preview Version Deployment –** Shows details of the preview version of our Client and which Entra ID groups it is targeted to (if relevant).
* **Production Version Deployment -** Shows details of the production version of our Client and which Entra ID groups it is targeted to (if relevant).
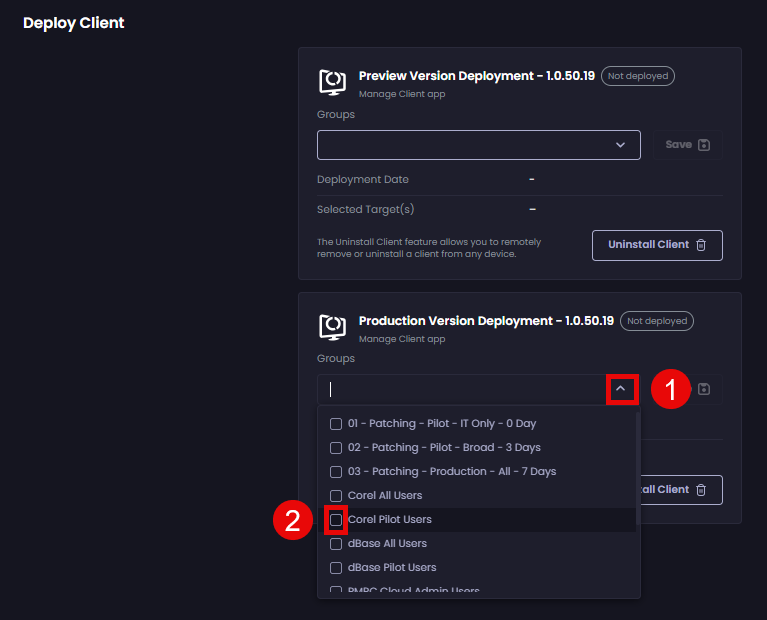
2. To deploy the Client (**Preview** or **Production**), click the **Groups** dropdown and select the relevant Entra ID group(s) you want to deploy the Client to.
{% hint style="danger" %}
**Important**
Please ensure that:
* Any devices you plan to install the PMPC Client on meet the [PMPC Client Supported configurations](/patch-my-pc-client/supported-configurations.md).
* You use one Entra ID group to target the installation of the Preview version of the Client and a separate group to target the installation of the Production version.
* You do not have the same devices in the Entra ID groups being used to target the installation of the Preview and Production versions of the Client.
{% endhint %}
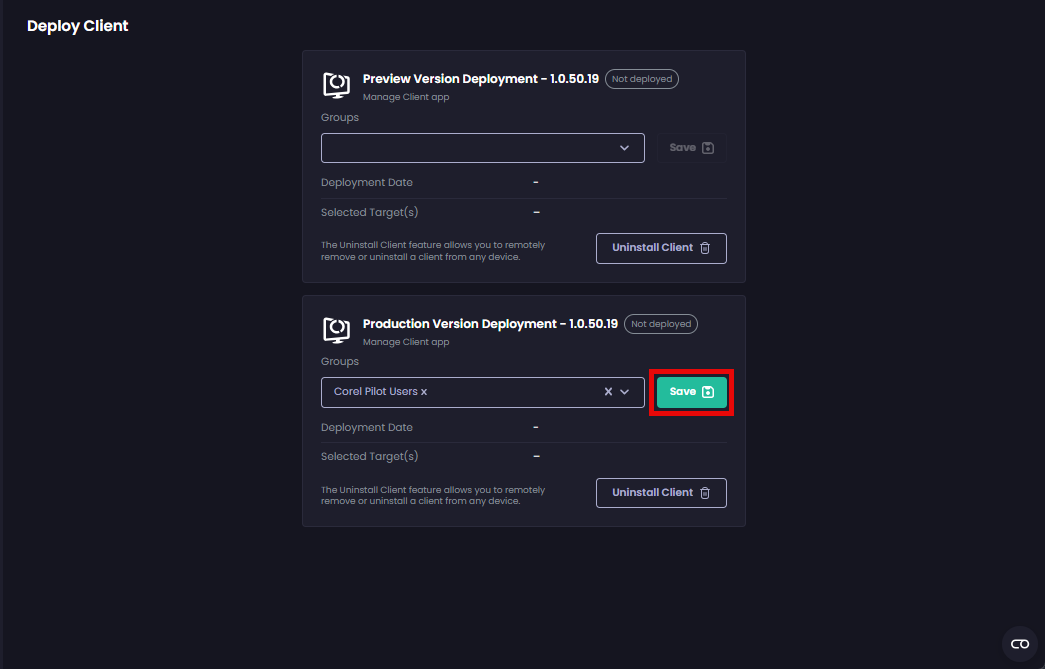
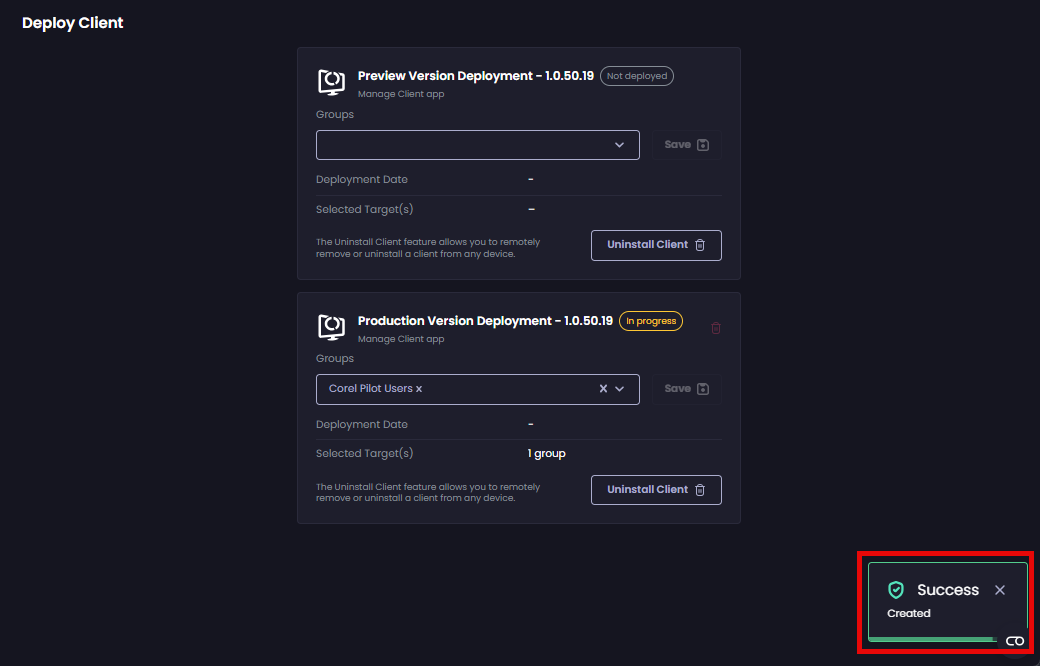
3. Click **Save**
The **Success - Created** notification is shown.
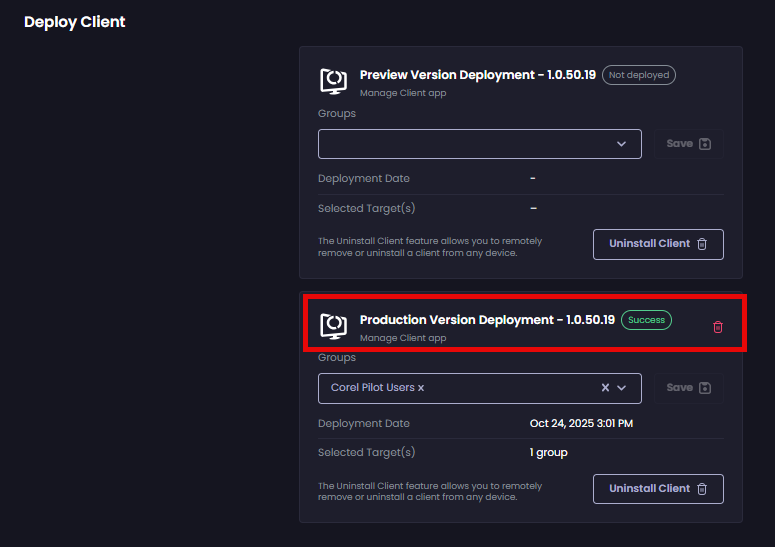
Once the Win32 app for the Client has been created in Intune, the status updates to **Success** and the Client will be deployed to the targeted devices.
As the Client is installed on the targeted devices, the number of **Devices Managed** shown in the **Dashboard** will increase.
{% hint style="success" %}
**Tip**
You can also check for the existence of the **C:\ProgramData\Patch My PC\Client** folder on any target devices and review the following log to monitor the installation of the Client:
`C:\Windows\Temp\PatchMyPC_Client_Installer_msi.log`
{% endhint %}
{% hint style="info" %}
**Note**
To deploy the Client to other Entra ID groups, select the relevant groups from the **Groups** dropdown and click **Save**. The **Success – Updated** notification will be displayed and the Client will be deployed to the additional groups.
{% endhint %}
## Switching between Deployment Channels
If you want to switch a device between deployment channels (i.e. from using the Preview version of the Client to the Production version, or vice versa), you should:
1. Remove the device(s) from the relevant Entra ID group or remove the relevant Entra ID group from targeting.
2. [Uninstall the Client](/patch-my-pc-client/manage/uninstall.md).
3. Once the Client has been uninstalled, add the device(s) to the relevant Entra ID group or add the relevant Entra ID group to target the desired channel.
---
# Agent Instructions
This documentation is published with GitBook. GitBook is the documentation platform designed so that both humans and AI agents can read, navigate, and reason over technical content effectively. Learn more at gitbook.com.
## Querying This Documentation
If you need additional information that is not directly available in this page, you can query the documentation dynamically by asking a question.
Perform an HTTP GET request on the current page URL with the `ask` query parameter, and the optional `goal` query parameter:
```
GET https://docs.patchmypc.com/patch-my-pc-client/manage/deploy.md?ask=&goal=
```
`ask` is the immediate question: it should be specific, self-contained, and written in natural language.
`goal` is optional and describes the broader end goal you are ultimately trying to accomplish on behalf of the user. GitBook uses it to tailor the answer towards what is most useful for that goal.
The response will contain a direct answer to the question and relevant excerpts and sources from the documentation.
Use this mechanism when the answer is not explicitly present in the current page, you need clarification or additional context, or you want to retrieve related documentation sections.